This blog is primarily intended for DSLR or 'bridge camera' users. It will also help if you own an advanced 'point and shoot' digital camera which has a spot metering mode built into it.This will help you get the most out of a powerful metering mode available in your camera but very rarely used.
Spot Metering is available in all DSLRs, most of the so called 'super zoom' or 'bridge' cameras and many regular point and shoot cameras. To find out if your camera has a Spot Metering mode, refer to your camera's user manual While with your manual, you may also like to find out how to activate spot metering on your camera.
Unfortunately most users, including DSLR users are not aware of the correct technique or true potential of spot metering. If used incorrectly, the Spot Metering mode can produce disappointing results. Once you understand the correct usage, this mode can work wonders, particularly in high contrast lighting situations.The most commonly used metering mode, the Matrix mode (also known as Evaluative or Pattern mode on some camera brands), gives reasonably accurate exposure for a scene with average contrast. However, it has serious limitations when dealing with a high contrast situation. Also, the exposure indicated by the Matrix Metering may vary depending on which part of the scene the camera is pointed at. While this metering relies on the built-in database in the camera, the exposures are often inaccurate and inconsistent in difficult lighting conditions.
Before embarking on a detailed discussion on Spot Metering techniques, it would be appropriate to have a basic understanding of exposure measurement. To put it in oversimplified terms, the metering system perceives a subject to be of neutral grey reflectance value. Let us say this value is 18% grey.(for the sake of simplicity I am not entering into a discussion on why neutral grey is 18% and not 50% or whether digital camera meters are calibrated to 18% grey or 14%) The camera's exposure meter then evaluates the brightness of the subject and measures the degree of deviation from the 18% grey and gives a reading which will make the subject appear 18% grey. So if the subject is brighter than 18% grey, it will suggest (or automatically set) a lower exposure to render the subject 18% grey. Similarly if the subject is darker than 18% grey, the meter will indicate higher exposure. If the subject is actually of average grey reflectance, the metering system will work perfectly well. However, if the subject is brighter or lighter than mid grey, the meter may give a wrong reading. The exposure recommended by the meter may over expose a black suit to render it grey or underexpose snow to make it appear grey. The tonality of the subject has an impact on the exposure metering. The Matrix or Evaluative metering system of a modern camera has built in algorithm to compensate for such anomalies and can be depended upon to give a reasonably good exposure in low contrast situations. Under high contrast lighting conditions one cannot rely on the matrix metering to give consistent exposure or to nail the exposure exactly as you visualize in your creative mind.
When to use Spot Metering;
Most photographers I know rarely change their metering mode from the default Matrix (Evaluative) mode. In modern cameras the Matrix mode has considerably evolved with algorithm fine-tuned to a wide variety of situations. An average photographer may rarely find it necessary to use any other mode. However, just like the Auto White Balance (AWB) in most of the cameras, the evaluative metering is often unpredictable, inconsistent and often inaccurate. Just a slight shift of the camera angle, to include a bit more (or less) of the sky significantly impacts the exposure. This is more often the case in contrasty lighting or when the dynamic range of the camera is stretched to its limits. Very often one resorts to HDR (High Dynamic Range) to accommodate the dynamic range. Unfortunately the HDR images have a flat, grungy look, which may not be realistic. The point I am trying to make is that very often we resort to HDR even when it is not required. In this situation, if the exposure is properly evaluated taking into account the brightest highlights and the darkest shadows we may be able to capture the full tonal range that the camera is capable of. Modern DSLRs and even point and shoot cameras have a reasonably good dynamic range. Our aim should be to fully utilize the dynamic range of the camera. By advanced spot metering techniques we can squeeze in the maximum range the camera is capable of without resorting to HDR. In very contrasty lighting, where we want details in the darkest shadows and the brightest highlights Spot Metering is the best mode.
Spot Metering Techniques
There is a bit of a learning curve involved in using the Spot Metering mode. I hope this blog helps you in getting started. While spot metering is often used in product and portrait photography to measure lighting ratios, I will be concentrating on using the spot metering mode for landscape photography as this will be of interest to many of my readers.
It is important to note that Spot Metering mode works differently in different cameras. In most of the Nikons the spot metering area is the focus point (the small rectangle in the view finder used as focusing point). In most Canons, Spot Metering area is only the central focus point. In Nikon, therefore, the Spot Metering point can be moved around in the view finder. For other cameras please refer to the instruction manual. Another important point to note is that unlike a dedicated hand held spot meter like the Sekonic L758 series, the spot metering area is not constant. It will depend on the lens being used. The Spot will be wider if a wide angle lens is being used and narrows down with a telephoto lens. So unlike the L758 with a 1 degree spot, you may expect a spot of 10-3 degrees depending on the lens. This information is very important if you want to take a reading from a very small area.
There are three different techniques for using the Spot Metering Mode to get excellent and consistent results. After taking a spot meter reading as described below, you need to lock that exposure using AE lock button or manually set the exposure, recompose and shoot. If you are not sure about the method of taking exposure reading, please refer to your camera's user manual.
1.) Metering off a known neutral grey area
2.) Metering off a grey card
3.) Using the zone system
1.) Metering off a known neutral reflectance area:
As discussed earlier, an exposure meter measures the deviation from 18% grey and adjusts the exposure to give a neutral reflectance value. If, therefore, we take a reading from a known mid reflectance area of our scene, we will get a correct reading. By taking a reading from a known neutral area the exposure of all parts of the scene in the same lighting will automatically fall in place. If, for example, a bride in white dress and groom in black suit are standing on a lawn, we will get correct exposure if we take the spot reading off the green grass as it known to be of around 18% reflectance. We can identify objects in a scene with reflectance value of or around mid grey. Keep in mind these objects need not necessarily be grey in colour. They can be of any color as long as they reflect 18% light. I know you must now be wondering how can one identify an object with mid grey tone (18% grey). Relax. You need not really worry about the percentage of reflectance. For this method just meter off any object which is neither too dark nor too light. Some objects which can be used for spot metering are grass, leaves, stones and parts of clothing which are neither too bright nor too dark. You may find many objects in your natural surroundings which represent neutral grey. One important thing to keep in mind is that the object you are using for spot metering should be in the same lighting as your subject.
2.) Metering off a grey card:
This method is more accurate than the one discussed above. This method is essentially the same as the one above but here instead of selecting a natural object with neutral reflectance, we use a calibrated grey card. Grey cards are readily available and these give a more accurate reading. Just place a grey card in the same light as your subject and take the reading off it using the spot metering mode in your camera. It is a good practice to carry a grey card in your camera bag.
3.) Using the Zone System:
This , by far, is the most useful method for landscape photographers. The results from using this method is truly rewarding. I strongly recommend my readers to go through this section carefully as I have immensely benefited by this method. The Zone System is a fairly complex subject and there are many books entirely devoted to this. A full discourse on zone system is beyond the scope of this blog. I will try to cover this in a nutshell. This may not be the exact replica of the Zone System as propagated by the master landscape photographer Ansel Adams but I have tried to simplify as much as I can. So here goes. The entire tonal range of a scene is divided into 11 segments (0 to X). Zero represents the darkest area of a scene. This is an area so dark that it contains no details. On the opposite end we have Zone X. This is the brightest area of the scene. It is so bright that it is totally washed out and contains no details. The entire spectrum of luminance comes between these. Zone 1 is the darkest area with some discernable details. On the the other end we have Zone IX which represents the brightest part of the scene with some details.Each Zone represents one stop of exposure. As we move from Zone 0 to Zone X we are increasing the exposure by one Stop for each zone.For those who are familiar with histograms in their cameras Zone IX represents the right side of the histogram just before highlights are blown out. (The tonal range represented by Zones 0 to X are represented on a Histogram as 0 to 255) In the 11 segment Zone scale (Zone 0 to Zone X) zone V represents the mid point or 18% reflectance value. In the Histograms this is midpoint represented by 118 in the scale of 0-255. The range of tones a camera can accommodate without blowing off the highlights or clipping shadows is known as its Dynamic Range
Our aim is to capture the maximum tonal range in our image with discernable details in the darkest shadows and brightest highlights and to optimally utilize the dynamic range of our camera. Basically we want to capture everything from Zone I to Zone IX (remember, zones 0 and X have no details). How do we do this? One way to achieve this is to meter off a neutral grey object. We can do this by any of the methods described above. However, we may not be having an accurate 18% grey card handy. Finding a mid grey object to meter from may be too subjective to be accurate. It is, much easier to identify the brightest area of our scene. As we have discussed earlier whatever we meter is exposed for 18% reflectance. In other words whatever we meter is placed in zone V. Now consider this. If you meter the brightest part of your image, say a white cloud or snow, the camera's exposure system is going to place that in Zone V which is a mid grey. Now we do not want our white cloud or snow to be mid grey. Moreover by placing the brightest part of the scene at Zone V everything which is darker gets pushed further to the left and the shadows may become devoid of details. This also means that we are not utilizing the full dynamic range our camera is capable of yielding. We want the cloud or snow to be white with details. In other words we want to place them in Zone IX or as close to it as possible.
Modern DSLRs have considerable dynamic range. For a mid range DSLR the range can be upto around 7 stops (4 stops below and 3 stops above the normal) The dynamic range of a high end DSLR may be as high as 10 stops (5 stops on either side of normal). Point and shoot cameras may have a dynamic range of upto 4 stops (2 on either side of normal)
Now coming back to our scene. When we are shooting our landscape lookout for the brightest highlight and the darkest shadow (you can do this only by spot metering) . If they are within the dynamic range of your camera go ahead and shoot. If your scene is beyond the dynamic range of the camera, try to protect the highlight from blowing out. This is how you do it in practice. Meter the brightest part of the image where you want some details. The reading will place this part in zone V which is mid grey. Now we want our snow or white cloud to be white, not grey. We want to push this as much to the right as possible. If you are using a mid range DSLR you have a dynamic range which can extend 3 stops above zone V. You can safely expose for Zone VIII. Let us take a practical example. Suppose you are capturing a landscape with hills, greenery and clouds.You want to capture as much detail as possible in the cloud without blowing out. Take a spot meter reading from the brightest part of the cloud. Say this reading is f/22 (for whatever shutter speed and ISO you are working with). Now f/22 will render the cloud as middle grey. Your mid range DSLR has a dynamic range upto 3 Stops above zone V. You can safely expose 3 stops more to reach zone VIII. Go ahead and open up 3 stops from F/22 so your correct exposure for this shot will be f/8.With this exposure your dynamic range will be optimally utilized. Let us take another example to make this concept clear. This time we will keep the aperture constant and change the exposure using shutter speed as this is the preferred method in landscape photography due to depth of field concerns. Suppose the metered exposure for the cloud is 1/1000 sec. This will place the sky in zone V. Our camera has a dynamic range of 3 stops above the normal. So, we can go upto zone 8 by decreasing the shutter speed by three stops. the correct exposure will be 1/125. This is also known as ETTR or exposing to the right. This will not blow out the highlights and protect details in them. The shadows will also be protected from clipping.
The dynamic range varies from camera to camera. You may have to experiment with your camera to determine its range. As a general rule, upto two stops in either direction is safe with most modern cameras.
I hope you have learnt something new about spot metering. The best way to master this mode would be to set your camera in the spot metering mode and try out the three methods of spot metering. Keep notes on your exposure as you go along and critically evaluate your exposure. Fine tune your method based on your equipment and the desired results
Spot Metering is available in all DSLRs, most of the so called 'super zoom' or 'bridge' cameras and many regular point and shoot cameras. To find out if your camera has a Spot Metering mode, refer to your camera's user manual While with your manual, you may also like to find out how to activate spot metering on your camera.
Unfortunately most users, including DSLR users are not aware of the correct technique or true potential of spot metering. If used incorrectly, the Spot Metering mode can produce disappointing results. Once you understand the correct usage, this mode can work wonders, particularly in high contrast lighting situations.The most commonly used metering mode, the Matrix mode (also known as Evaluative or Pattern mode on some camera brands), gives reasonably accurate exposure for a scene with average contrast. However, it has serious limitations when dealing with a high contrast situation. Also, the exposure indicated by the Matrix Metering may vary depending on which part of the scene the camera is pointed at. While this metering relies on the built-in database in the camera, the exposures are often inaccurate and inconsistent in difficult lighting conditions.
Before embarking on a detailed discussion on Spot Metering techniques, it would be appropriate to have a basic understanding of exposure measurement. To put it in oversimplified terms, the metering system perceives a subject to be of neutral grey reflectance value. Let us say this value is 18% grey.(for the sake of simplicity I am not entering into a discussion on why neutral grey is 18% and not 50% or whether digital camera meters are calibrated to 18% grey or 14%) The camera's exposure meter then evaluates the brightness of the subject and measures the degree of deviation from the 18% grey and gives a reading which will make the subject appear 18% grey. So if the subject is brighter than 18% grey, it will suggest (or automatically set) a lower exposure to render the subject 18% grey. Similarly if the subject is darker than 18% grey, the meter will indicate higher exposure. If the subject is actually of average grey reflectance, the metering system will work perfectly well. However, if the subject is brighter or lighter than mid grey, the meter may give a wrong reading. The exposure recommended by the meter may over expose a black suit to render it grey or underexpose snow to make it appear grey. The tonality of the subject has an impact on the exposure metering. The Matrix or Evaluative metering system of a modern camera has built in algorithm to compensate for such anomalies and can be depended upon to give a reasonably good exposure in low contrast situations. Under high contrast lighting conditions one cannot rely on the matrix metering to give consistent exposure or to nail the exposure exactly as you visualize in your creative mind.
When to use Spot Metering;
Most photographers I know rarely change their metering mode from the default Matrix (Evaluative) mode. In modern cameras the Matrix mode has considerably evolved with algorithm fine-tuned to a wide variety of situations. An average photographer may rarely find it necessary to use any other mode. However, just like the Auto White Balance (AWB) in most of the cameras, the evaluative metering is often unpredictable, inconsistent and often inaccurate. Just a slight shift of the camera angle, to include a bit more (or less) of the sky significantly impacts the exposure. This is more often the case in contrasty lighting or when the dynamic range of the camera is stretched to its limits. Very often one resorts to HDR (High Dynamic Range) to accommodate the dynamic range. Unfortunately the HDR images have a flat, grungy look, which may not be realistic. The point I am trying to make is that very often we resort to HDR even when it is not required. In this situation, if the exposure is properly evaluated taking into account the brightest highlights and the darkest shadows we may be able to capture the full tonal range that the camera is capable of. Modern DSLRs and even point and shoot cameras have a reasonably good dynamic range. Our aim should be to fully utilize the dynamic range of the camera. By advanced spot metering techniques we can squeeze in the maximum range the camera is capable of without resorting to HDR. In very contrasty lighting, where we want details in the darkest shadows and the brightest highlights Spot Metering is the best mode.
Spot Metering Techniques
There is a bit of a learning curve involved in using the Spot Metering mode. I hope this blog helps you in getting started. While spot metering is often used in product and portrait photography to measure lighting ratios, I will be concentrating on using the spot metering mode for landscape photography as this will be of interest to many of my readers.
It is important to note that Spot Metering mode works differently in different cameras. In most of the Nikons the spot metering area is the focus point (the small rectangle in the view finder used as focusing point). In most Canons, Spot Metering area is only the central focus point. In Nikon, therefore, the Spot Metering point can be moved around in the view finder. For other cameras please refer to the instruction manual. Another important point to note is that unlike a dedicated hand held spot meter like the Sekonic L758 series, the spot metering area is not constant. It will depend on the lens being used. The Spot will be wider if a wide angle lens is being used and narrows down with a telephoto lens. So unlike the L758 with a 1 degree spot, you may expect a spot of 10-3 degrees depending on the lens. This information is very important if you want to take a reading from a very small area.
There are three different techniques for using the Spot Metering Mode to get excellent and consistent results. After taking a spot meter reading as described below, you need to lock that exposure using AE lock button or manually set the exposure, recompose and shoot. If you are not sure about the method of taking exposure reading, please refer to your camera's user manual.
1.) Metering off a known neutral grey area
2.) Metering off a grey card
3.) Using the zone system
1.) Metering off a known neutral reflectance area:
As discussed earlier, an exposure meter measures the deviation from 18% grey and adjusts the exposure to give a neutral reflectance value. If, therefore, we take a reading from a known mid reflectance area of our scene, we will get a correct reading. By taking a reading from a known neutral area the exposure of all parts of the scene in the same lighting will automatically fall in place. If, for example, a bride in white dress and groom in black suit are standing on a lawn, we will get correct exposure if we take the spot reading off the green grass as it known to be of around 18% reflectance. We can identify objects in a scene with reflectance value of or around mid grey. Keep in mind these objects need not necessarily be grey in colour. They can be of any color as long as they reflect 18% light. I know you must now be wondering how can one identify an object with mid grey tone (18% grey). Relax. You need not really worry about the percentage of reflectance. For this method just meter off any object which is neither too dark nor too light. Some objects which can be used for spot metering are grass, leaves, stones and parts of clothing which are neither too bright nor too dark. You may find many objects in your natural surroundings which represent neutral grey. One important thing to keep in mind is that the object you are using for spot metering should be in the same lighting as your subject.
2.) Metering off a grey card:
This method is more accurate than the one discussed above. This method is essentially the same as the one above but here instead of selecting a natural object with neutral reflectance, we use a calibrated grey card. Grey cards are readily available and these give a more accurate reading. Just place a grey card in the same light as your subject and take the reading off it using the spot metering mode in your camera. It is a good practice to carry a grey card in your camera bag.
3.) Using the Zone System:
This , by far, is the most useful method for landscape photographers. The results from using this method is truly rewarding. I strongly recommend my readers to go through this section carefully as I have immensely benefited by this method. The Zone System is a fairly complex subject and there are many books entirely devoted to this. A full discourse on zone system is beyond the scope of this blog. I will try to cover this in a nutshell. This may not be the exact replica of the Zone System as propagated by the master landscape photographer Ansel Adams but I have tried to simplify as much as I can. So here goes. The entire tonal range of a scene is divided into 11 segments (0 to X). Zero represents the darkest area of a scene. This is an area so dark that it contains no details. On the opposite end we have Zone X. This is the brightest area of the scene. It is so bright that it is totally washed out and contains no details. The entire spectrum of luminance comes between these. Zone 1 is the darkest area with some discernable details. On the the other end we have Zone IX which represents the brightest part of the scene with some details.Each Zone represents one stop of exposure. As we move from Zone 0 to Zone X we are increasing the exposure by one Stop for each zone.For those who are familiar with histograms in their cameras Zone IX represents the right side of the histogram just before highlights are blown out. (The tonal range represented by Zones 0 to X are represented on a Histogram as 0 to 255) In the 11 segment Zone scale (Zone 0 to Zone X) zone V represents the mid point or 18% reflectance value. In the Histograms this is midpoint represented by 118 in the scale of 0-255. The range of tones a camera can accommodate without blowing off the highlights or clipping shadows is known as its Dynamic Range
 |
| The Zone Scale- Zone V represents 18% Grey |
Modern DSLRs have considerable dynamic range. For a mid range DSLR the range can be upto around 7 stops (4 stops below and 3 stops above the normal) The dynamic range of a high end DSLR may be as high as 10 stops (5 stops on either side of normal). Point and shoot cameras may have a dynamic range of upto 4 stops (2 on either side of normal)
Now coming back to our scene. When we are shooting our landscape lookout for the brightest highlight and the darkest shadow (you can do this only by spot metering) . If they are within the dynamic range of your camera go ahead and shoot. If your scene is beyond the dynamic range of the camera, try to protect the highlight from blowing out. This is how you do it in practice. Meter the brightest part of the image where you want some details. The reading will place this part in zone V which is mid grey. Now we want our snow or white cloud to be white, not grey. We want to push this as much to the right as possible. If you are using a mid range DSLR you have a dynamic range which can extend 3 stops above zone V. You can safely expose for Zone VIII. Let us take a practical example. Suppose you are capturing a landscape with hills, greenery and clouds.You want to capture as much detail as possible in the cloud without blowing out. Take a spot meter reading from the brightest part of the cloud. Say this reading is f/22 (for whatever shutter speed and ISO you are working with). Now f/22 will render the cloud as middle grey. Your mid range DSLR has a dynamic range upto 3 Stops above zone V. You can safely expose 3 stops more to reach zone VIII. Go ahead and open up 3 stops from F/22 so your correct exposure for this shot will be f/8.With this exposure your dynamic range will be optimally utilized. Let us take another example to make this concept clear. This time we will keep the aperture constant and change the exposure using shutter speed as this is the preferred method in landscape photography due to depth of field concerns. Suppose the metered exposure for the cloud is 1/1000 sec. This will place the sky in zone V. Our camera has a dynamic range of 3 stops above the normal. So, we can go upto zone 8 by decreasing the shutter speed by three stops. the correct exposure will be 1/125. This is also known as ETTR or exposing to the right. This will not blow out the highlights and protect details in them. The shadows will also be protected from clipping.
 |
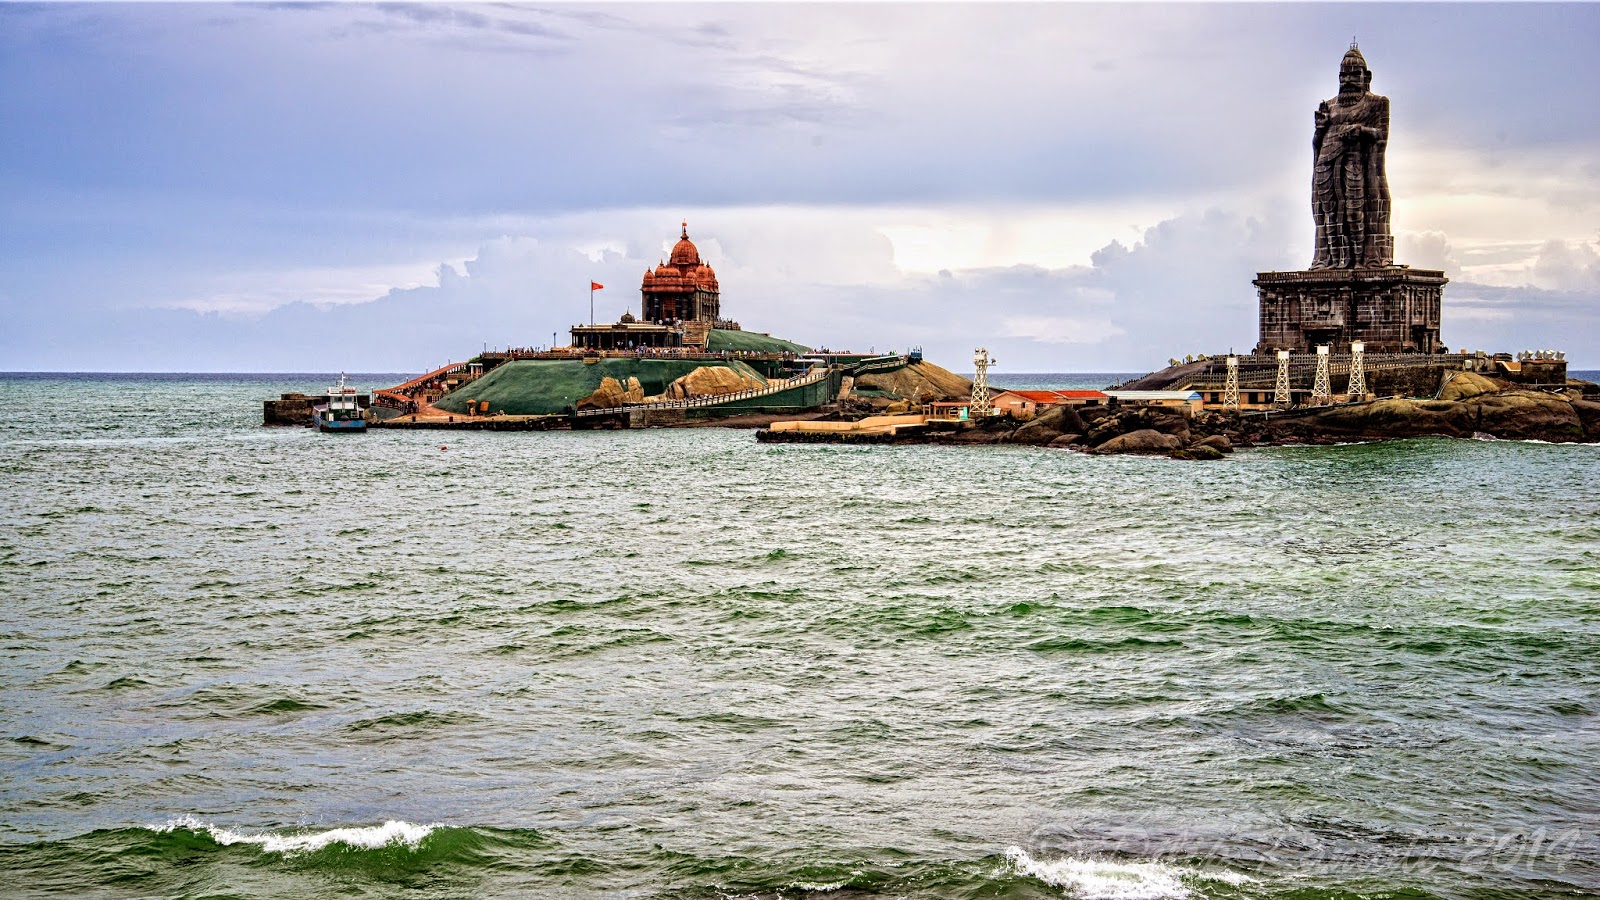
| A good exposure makes optimal use of the dynamic range of the camera. |
The dynamic range varies from camera to camera. You may have to experiment with your camera to determine its range. As a general rule, upto two stops in either direction is safe with most modern cameras.
I hope you have learnt something new about spot metering. The best way to master this mode would be to set your camera in the spot metering mode and try out the three methods of spot metering. Keep notes on your exposure as you go along and critically evaluate your exposure. Fine tune your method based on your equipment and the desired results
