If you are serious about your photography, you must ensure that your monitor is properly calibrated. The importance of display calibration in digital photography can not be overemphasized. There is a lot of difference in the way our eyes perceive a subject and the the way your camera captures. Again there is a wide difference in what your camera captures and what your monitor displays or what your printer prints. One may go at lengths to get a customs white-balance in the camera using proprietary white balance tools like the Expodisc or the Colorchecker Passport but if the monitor is not properly calibrated all that effort goes waste. Each digital camera records colours differently and to make matters worse your monitor interprets colours differently. It is not just colour that is of importance. The brightness and contrast of the monitor also have an important bearing on the way our image appears on our monitors. If you find that your prints are consistently dark, it means that your monitor is too bright. A red, pink or purple flower may appear different on your monitor from what you actually saw.
If you edit your images in Lightroom or Photoshop (or any image editing software for that matter), it is all the more important to calibrate your monitor. If your monitor is not properly calibrated you may end up adding more contrast to an already contrasty image because the contrast setting of your monitor was very low to start with. You may end up saturating colours that were already saturated or adjusting exposure on a perfectly exposed image.
Placement of your monitor, quality of ambient light and the glare on your monitor screen also play an important role on the accuracy of your display. Ideally the monitor should be placed in a room where the quality of ambient light does not change much. The monitor should not face a window or a direct source of light as this could result in lower contrast. The area surrounding the monitor should neither be too bright nor too dark.
Calibrating a monitor is actually a very complex procedure and involves the use of dedicated hardware and software. These calibration devices, unfortunately, do not come cheap. They cost upward of US $100. Not every photographer would like to spend that kind of money on display calibrators. Even if you seek professional help to get your monitor calibrated, it does not work out cheap as you have to recalibrate most of the monitors at least once a month.
Is there a simple and cheap way to calibrate your monitor? Well, there is! Buried deep inside your Windows or Mac menus there is a rather crude means of calibrating your monitor. Crude, because it depends on your eyes and can be tricky. Nevertheless, it is better to use this method rather than not calibrating your monitor at all. This may not be as accurate as the hardware based solutions but will be adequate for most amateurs.
I will try to explain this procedure in detail for Windows based PC using screen shots. The procedure for Apple Mac is similar and I have touched upon it at the end.
Calibrating display on a Windows based PC:
These screen shots are based on a Windows 8.1 System but the procedure is basically the same for all versions of Windows.
1. First you need to access the display settings. You can reach there by going to the the Control Panel/Hardware and Sound.
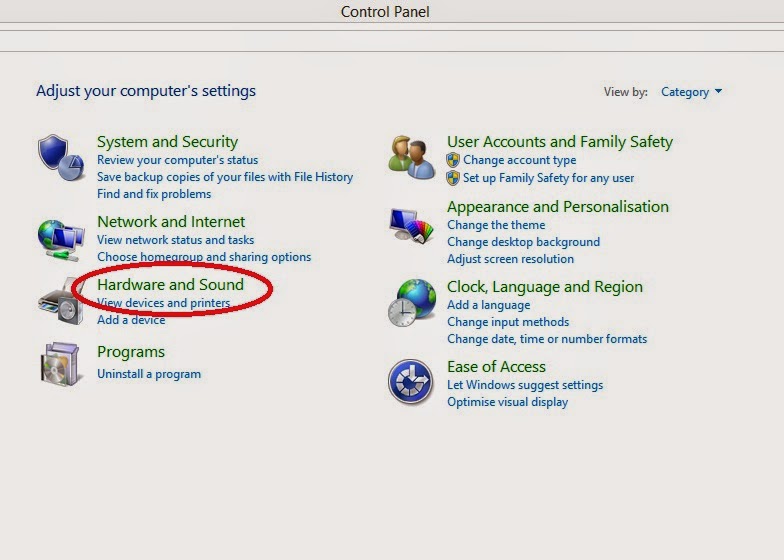 |
| Fig 1 |
2. Next, select 'Display'
 |
| Fig 2 |
3. Select 'Adjust resolution' from the left panel.
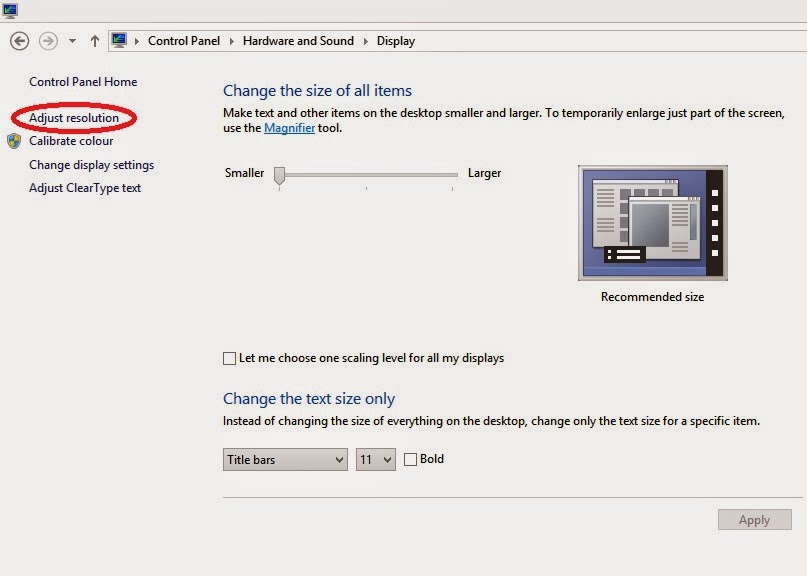 |
| Fig 3 |
4. Select 'Advanced Settings'
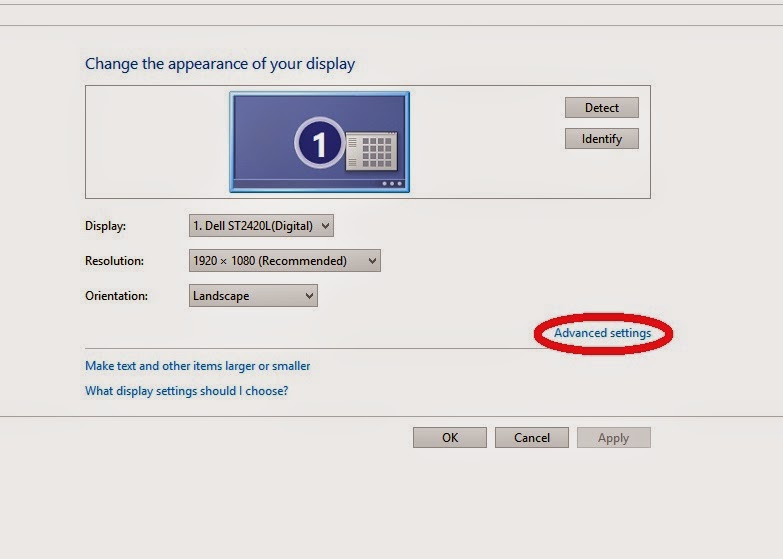 |
| Fig 4 |
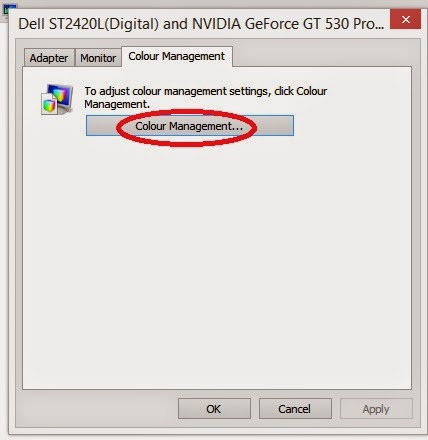
5. Select 'Color Management'
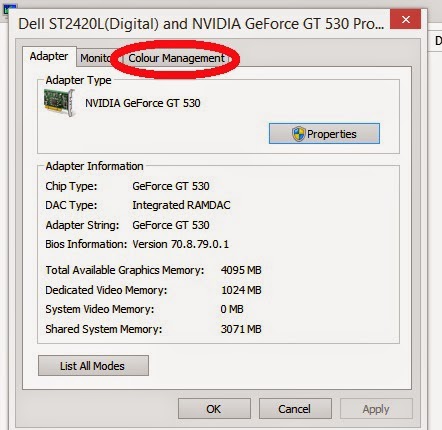 |
| Fig 5 |
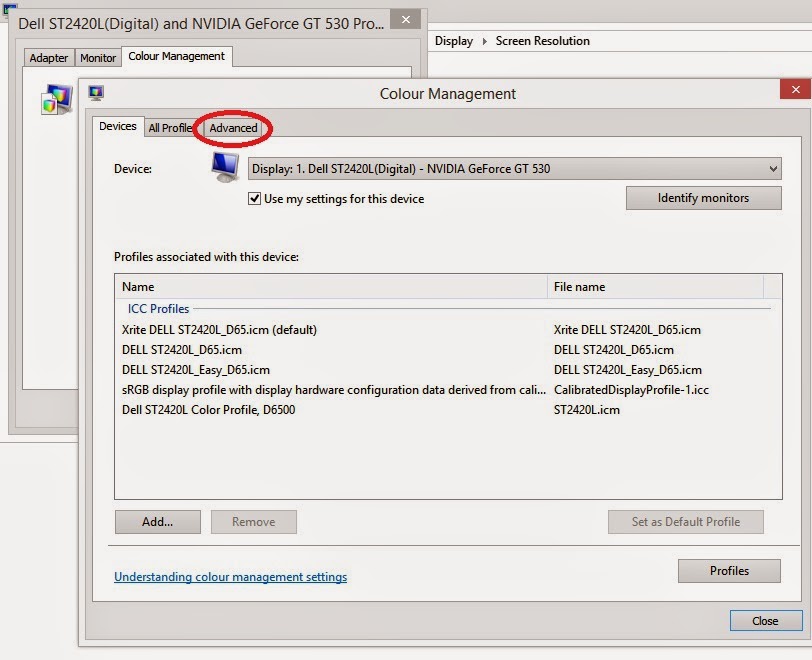
6. Again click 'Color Management'
 |
| Fig 6 |
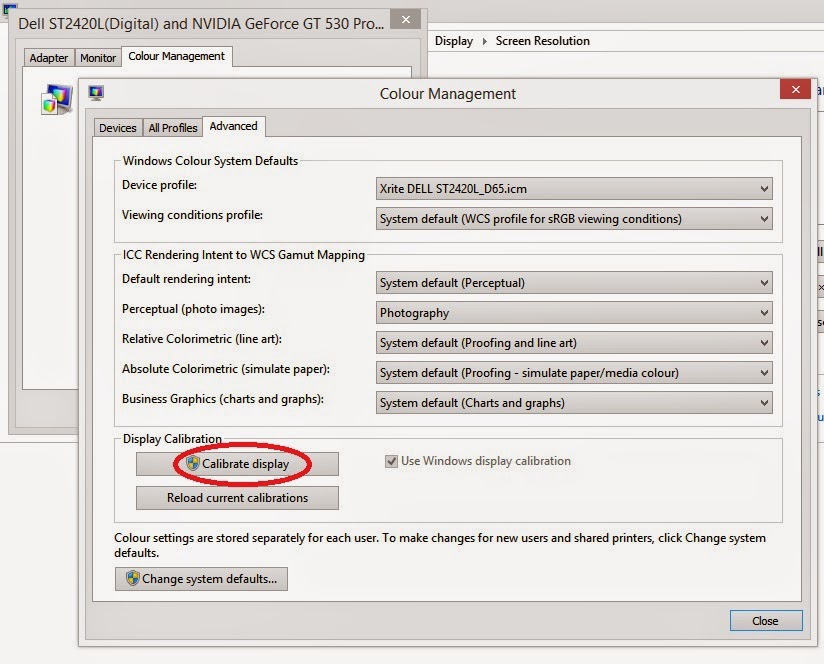
7. In the next window, select the 'Advanced' tab
 |
| Fig 7 |
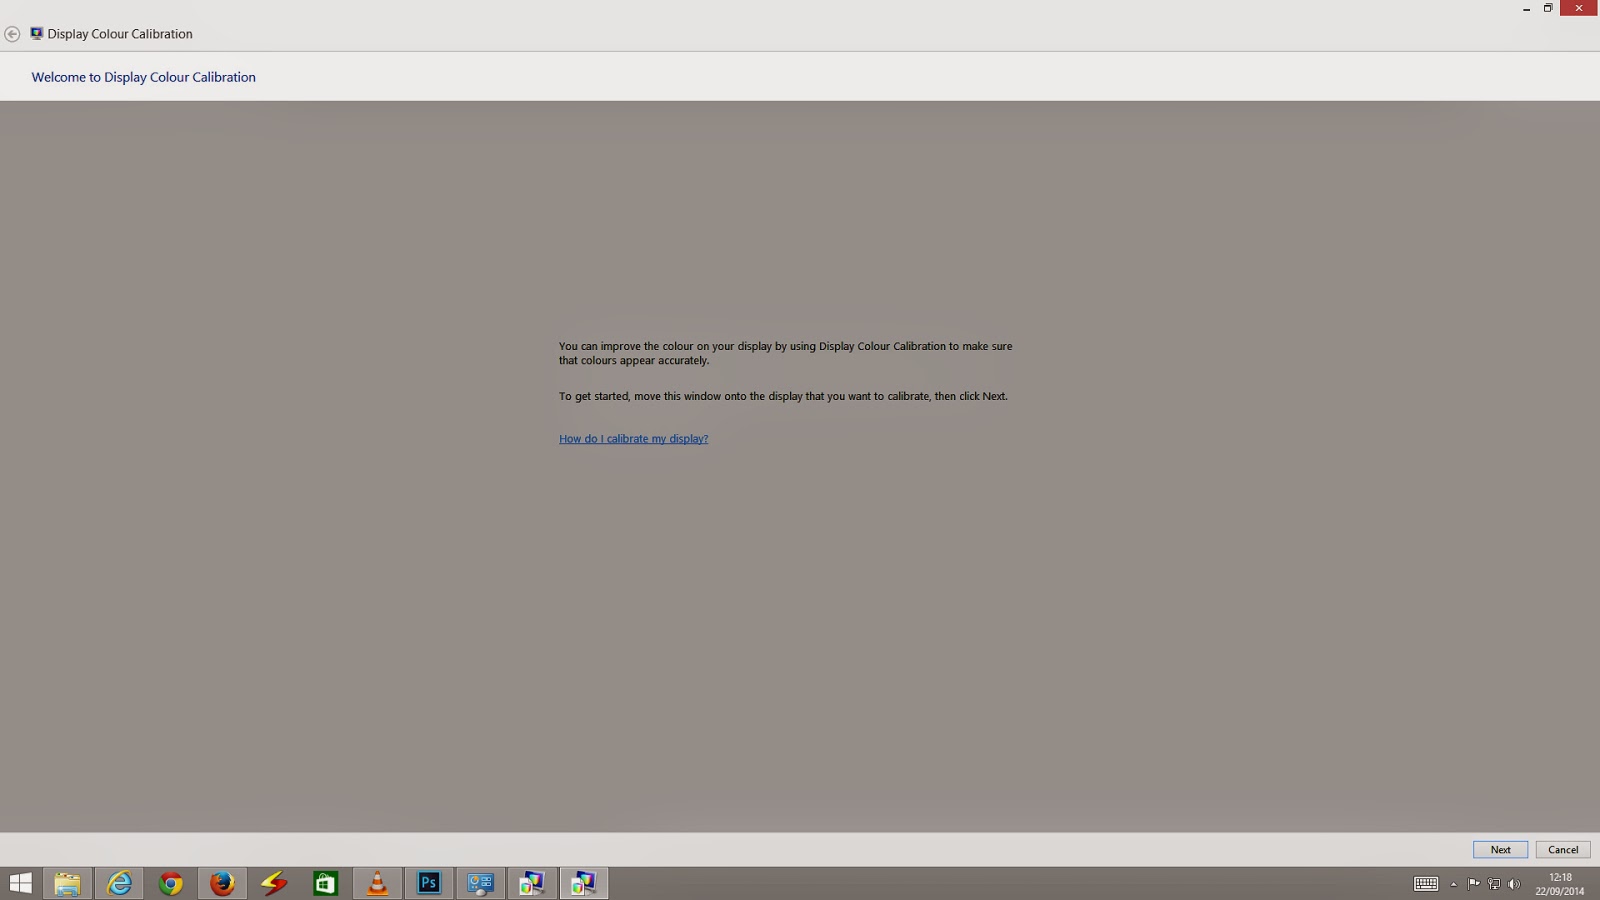
8. Select 'Calibrate Display'
 |
| Fig 8 |
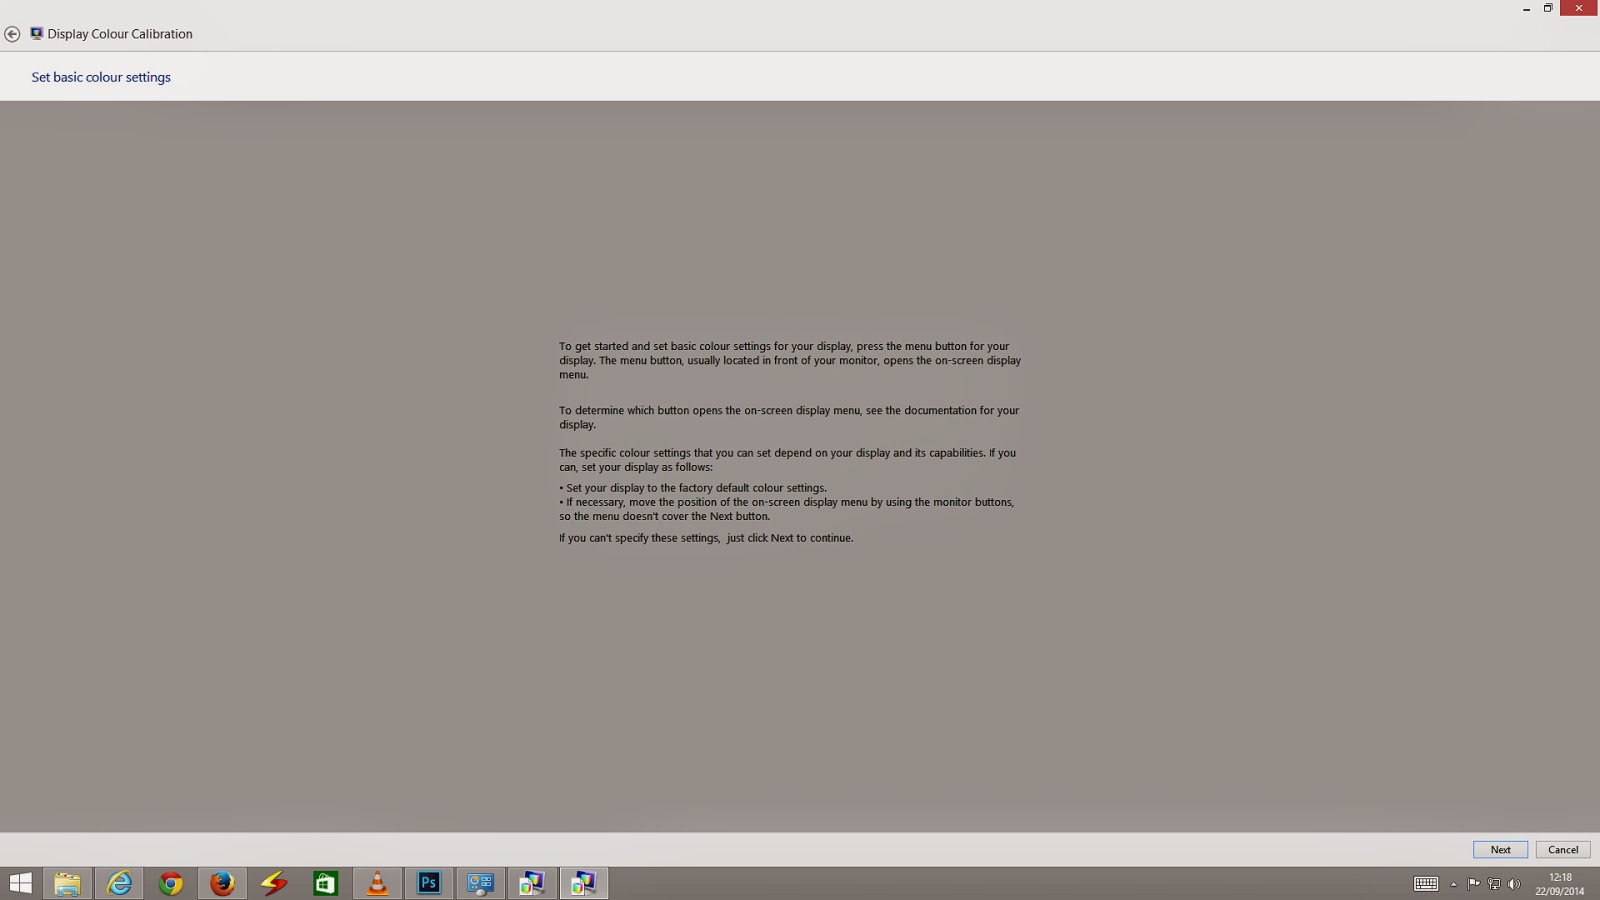
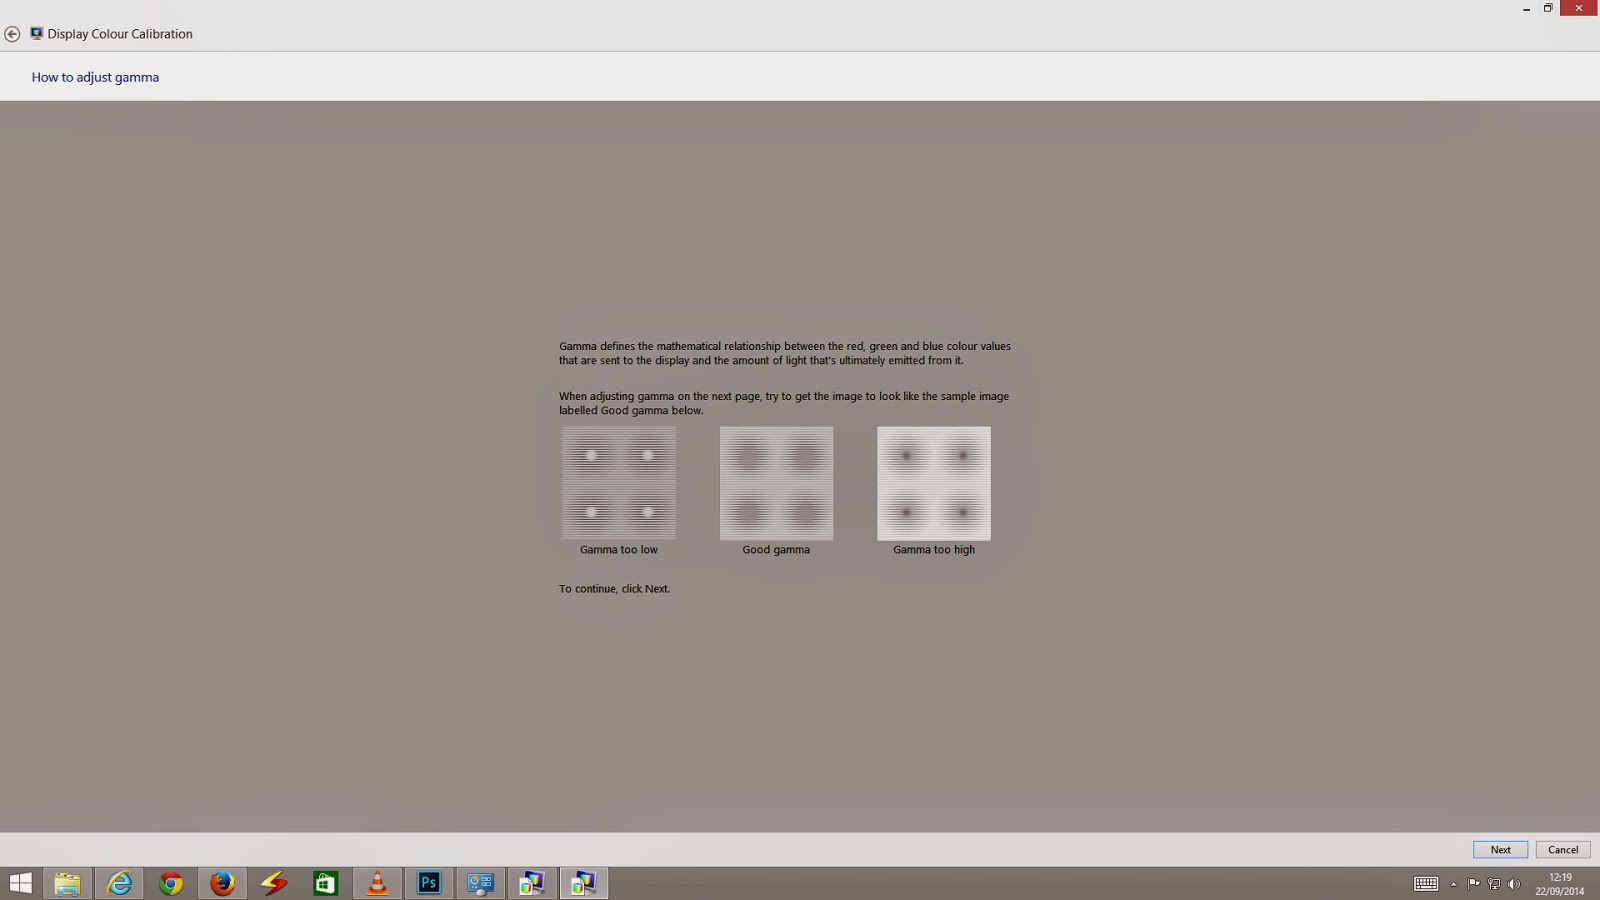
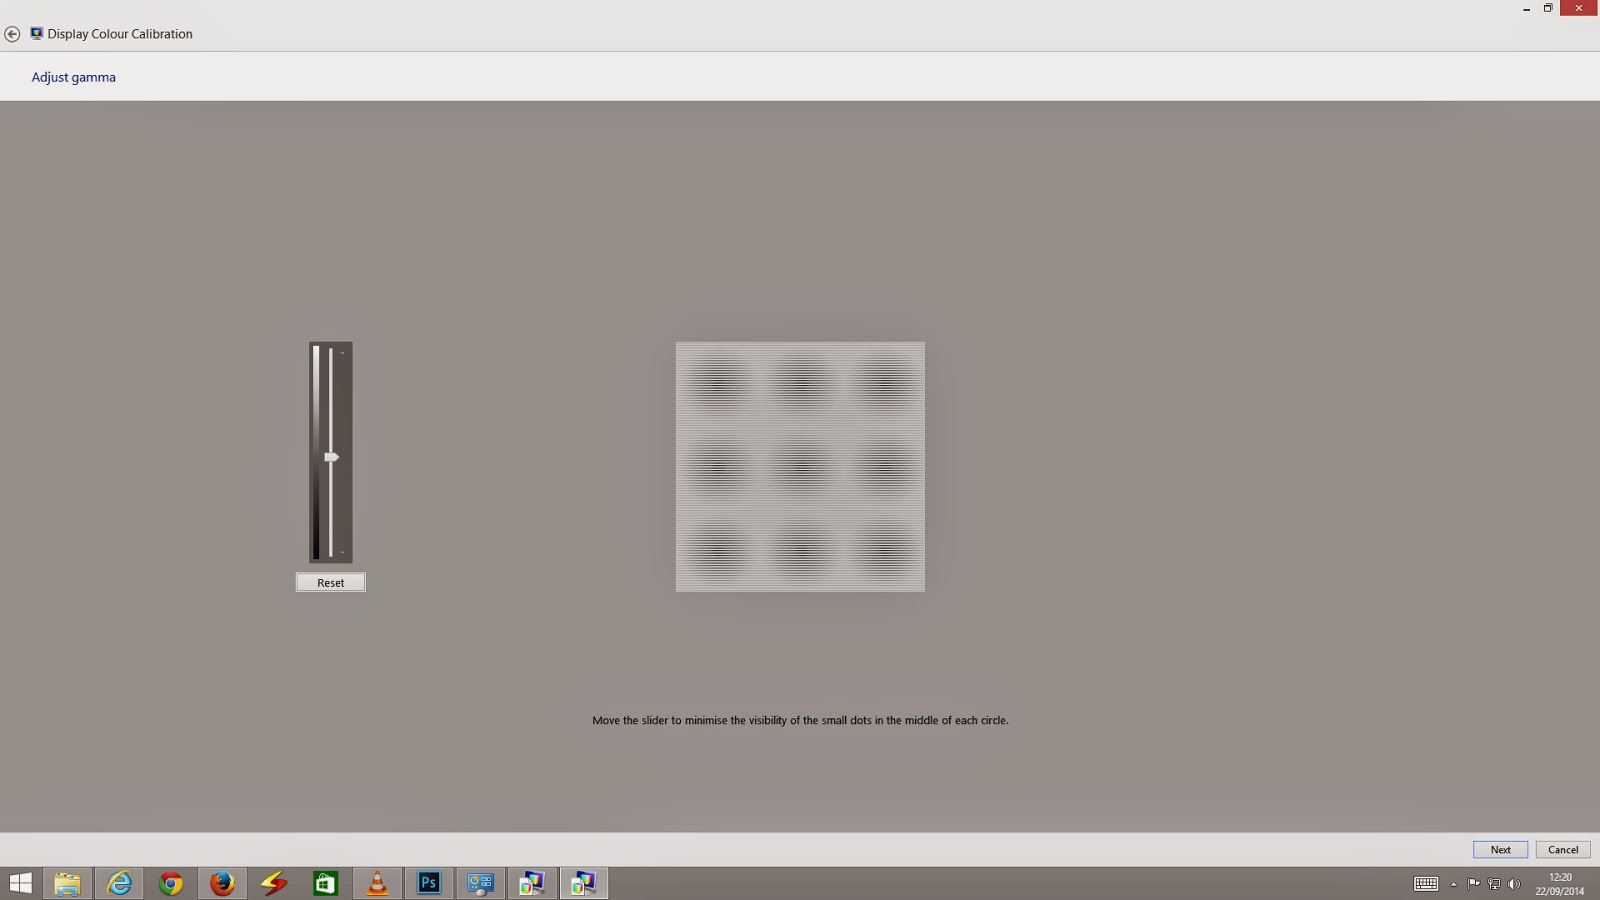
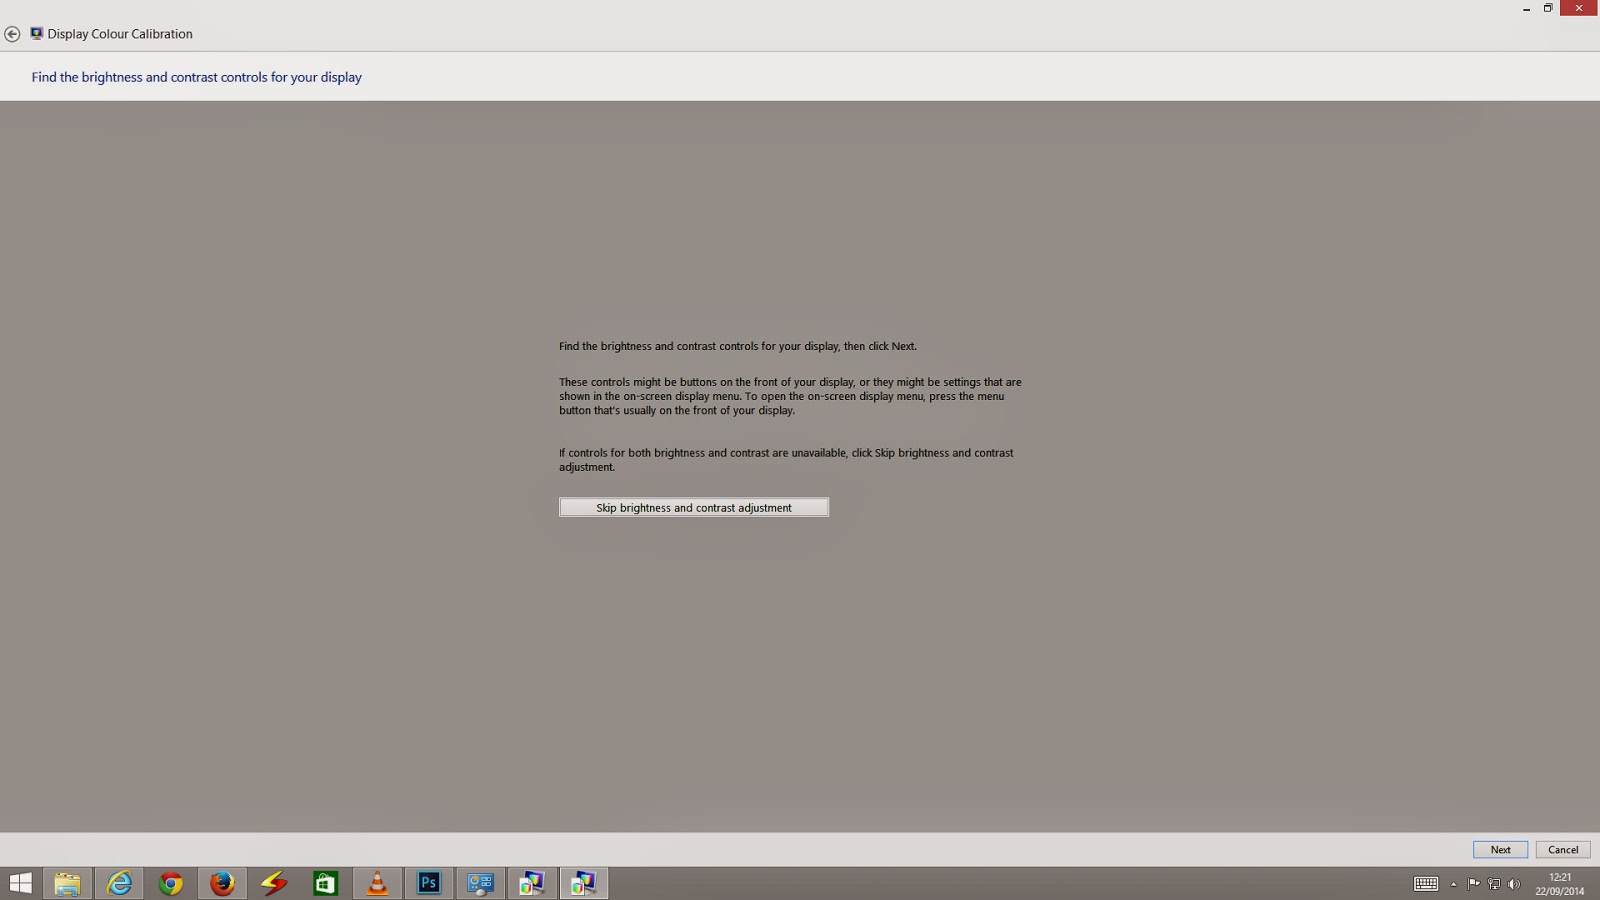
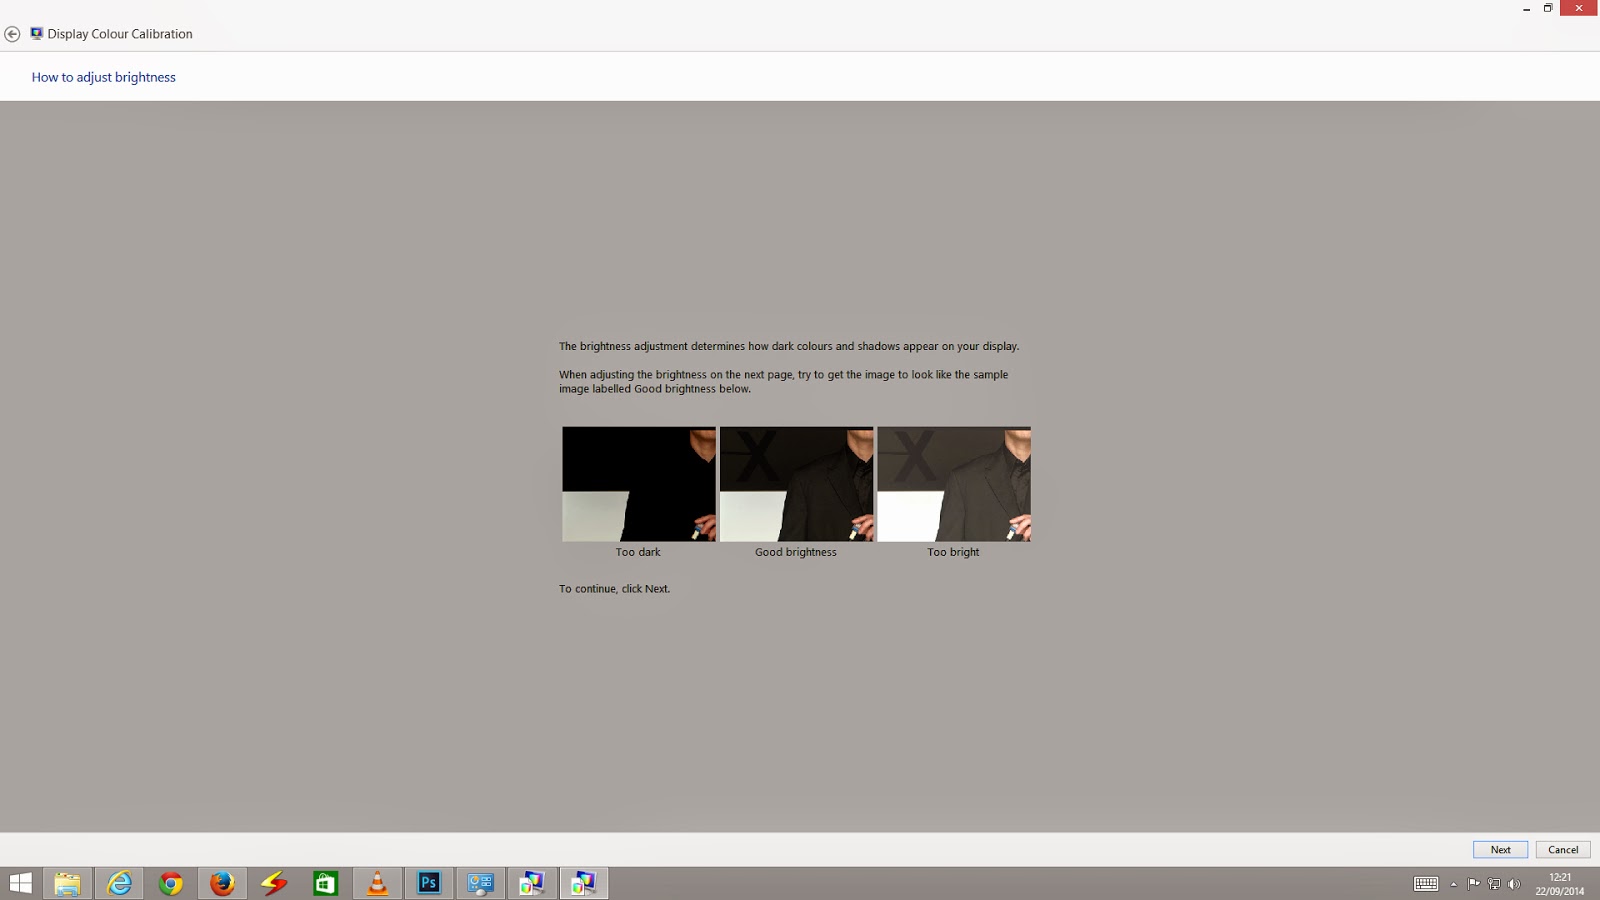
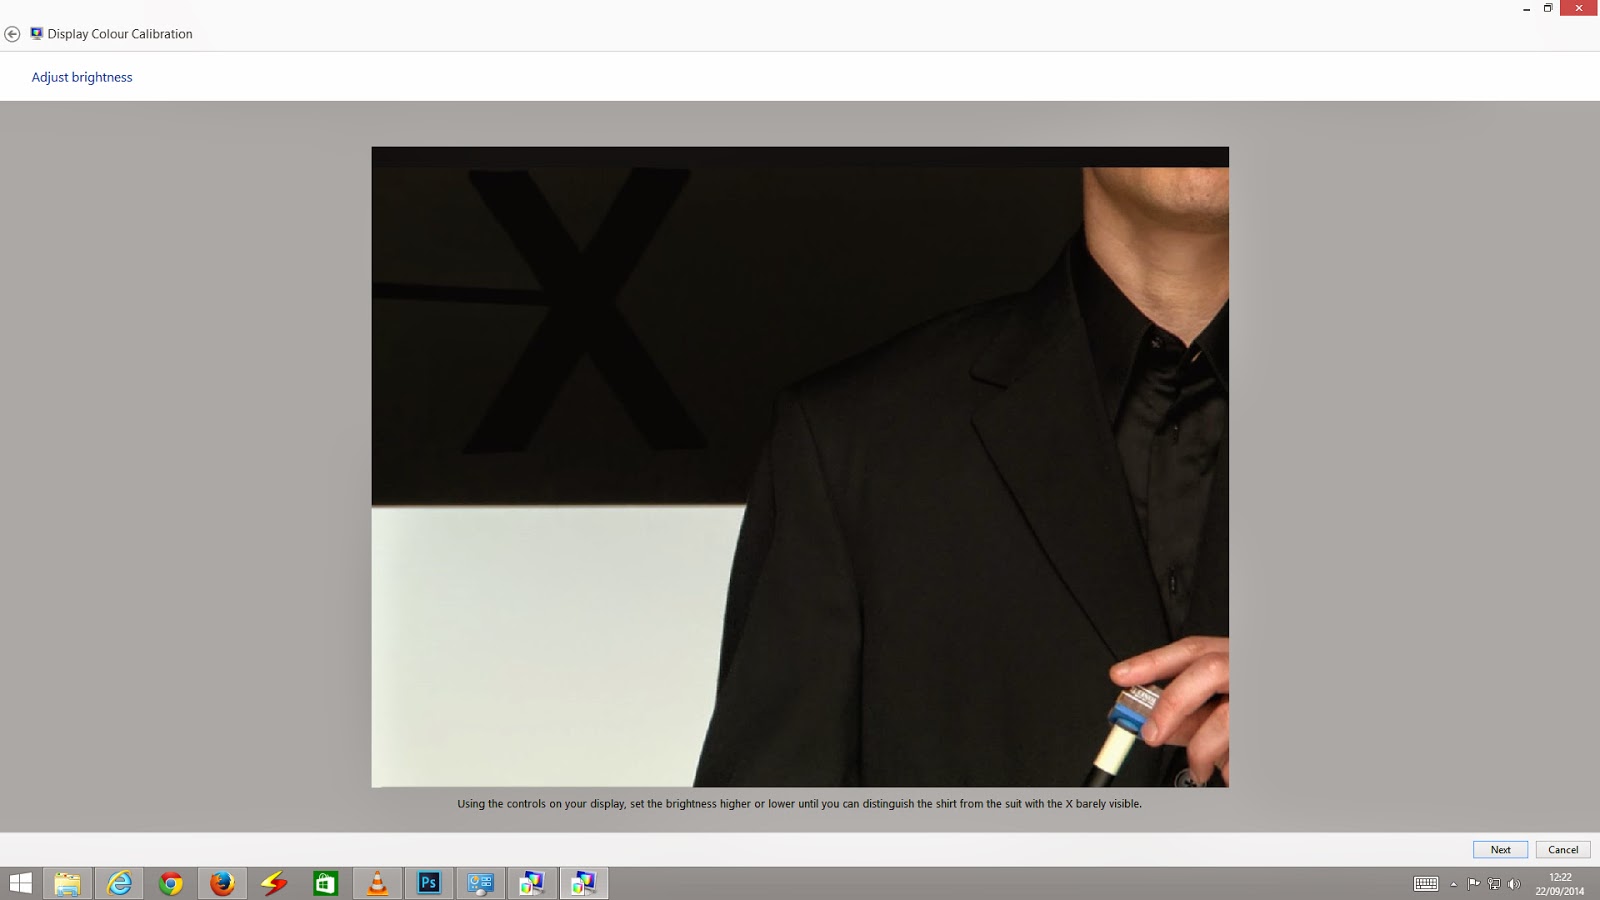
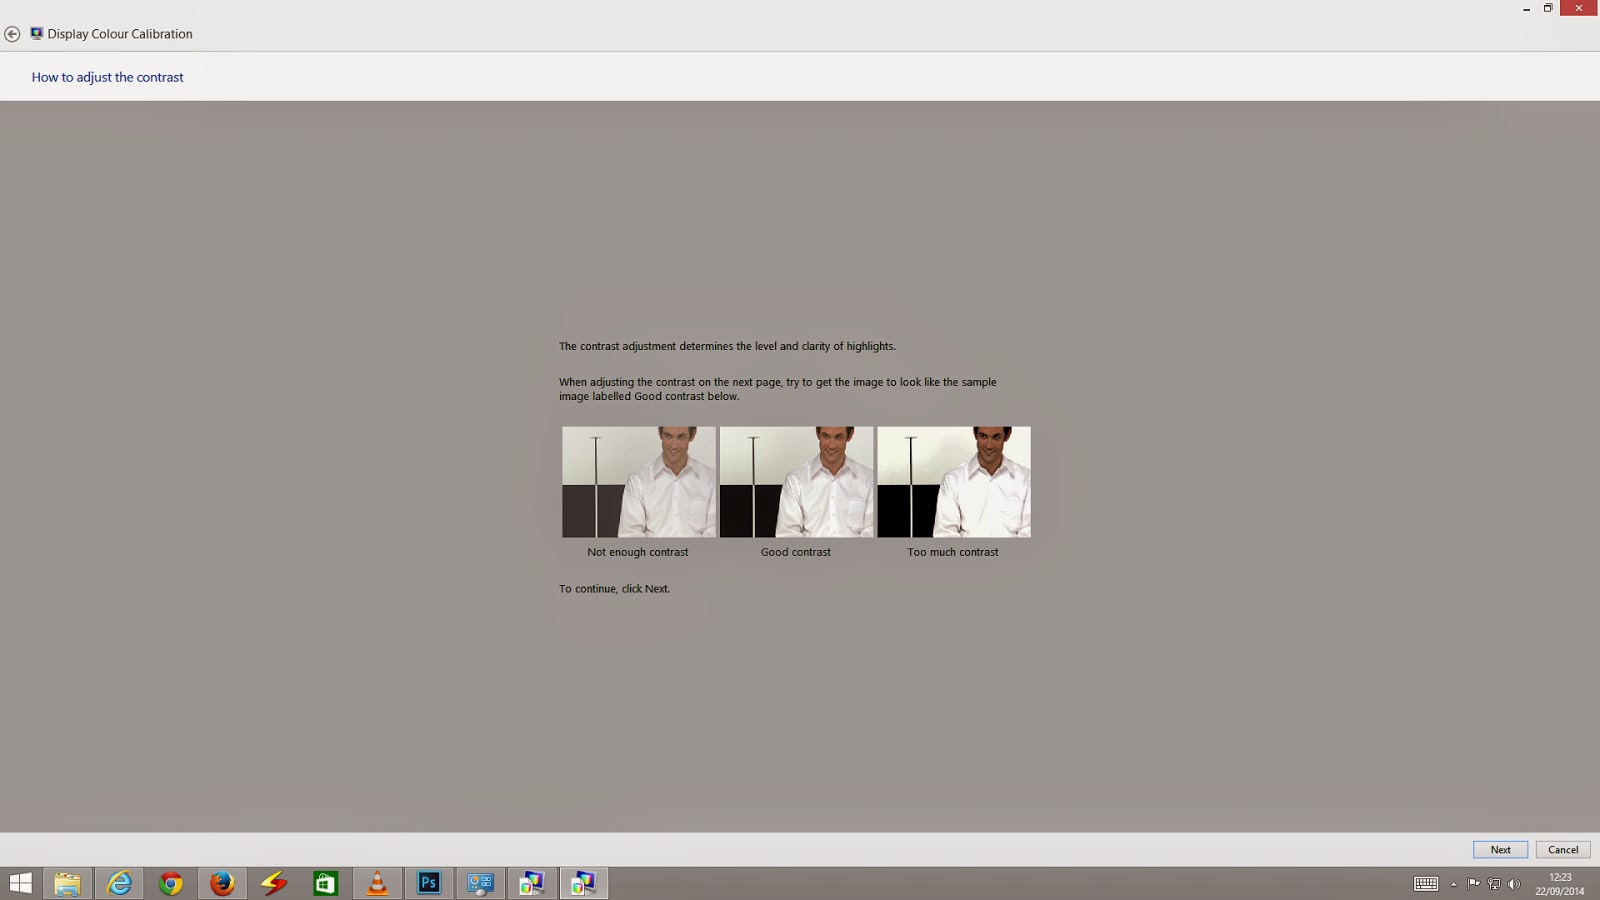
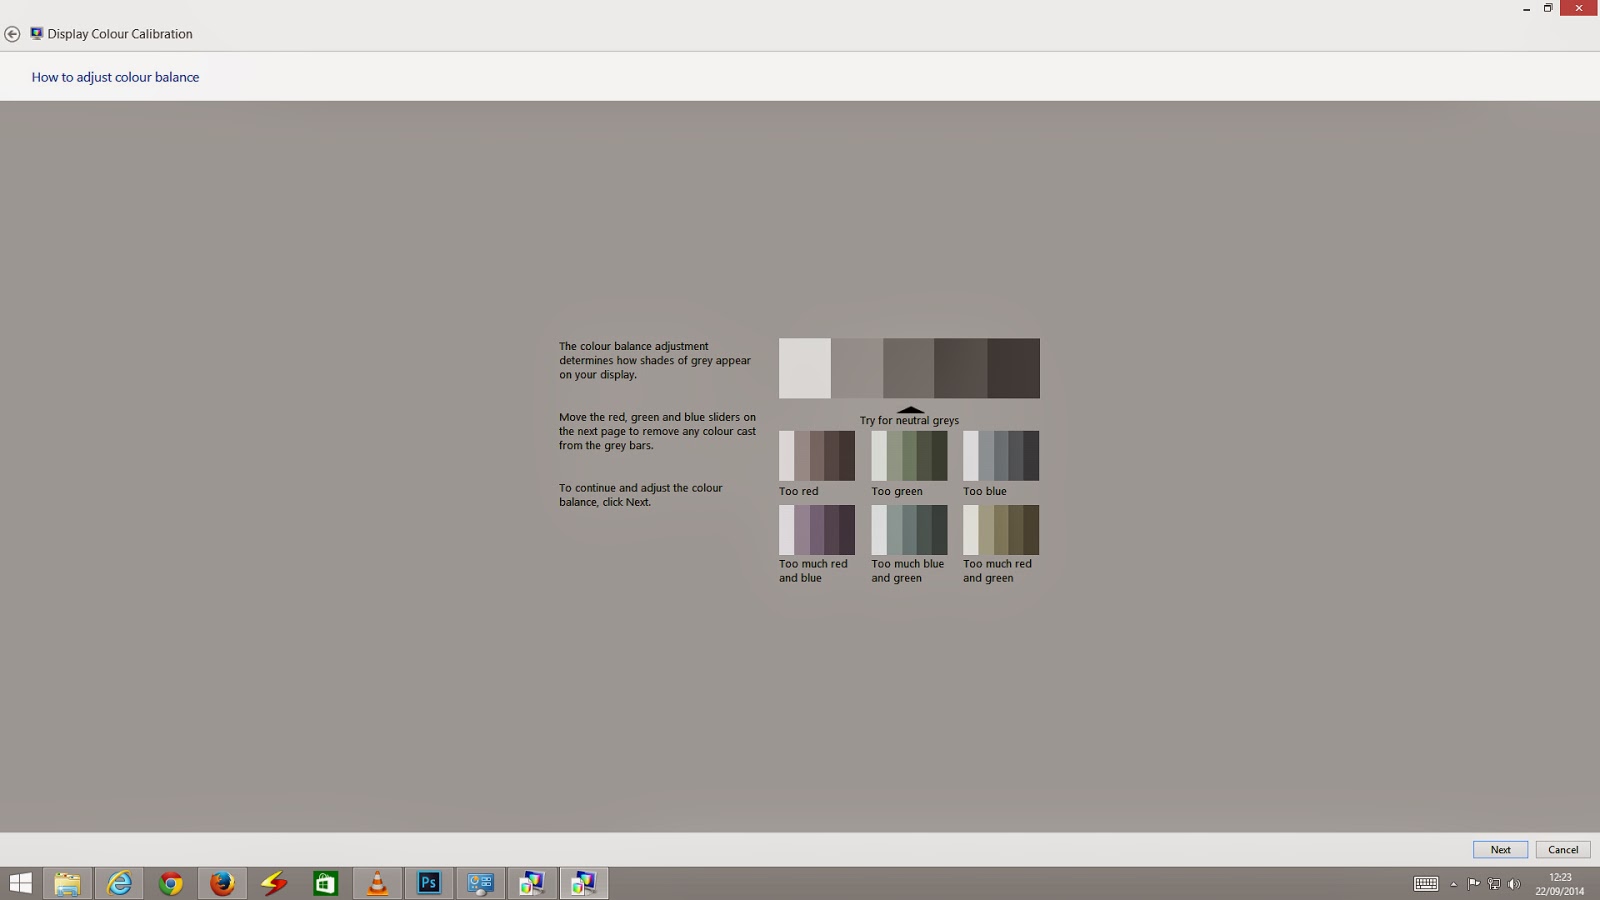
9. Next few screens (figures 9-21) are self explanatory. Just follow the instructions on the screen and move on to the next screen (by clicking on the 'Next ' button on the bottom right). Before you begin you should know where the brightness and contrast settings of your monitor are located. These are usually soft-touch buttons on the bottom or on the right side of the monitor.
 |
| Fig 9 |
 |
| Fig 10 |
 |
| Fig 11 |
 |
| Fig 12 |
 |
| Fig 13 |
 |
| Fig 14 |
 |
| Fig 15 |
 |
| Fig 16 |
 |
| Fig 17 |
 |
| Fig 18 |
 |
| Fig 19 |
 |
| Fig 20 |
 |
| Fig 21 |
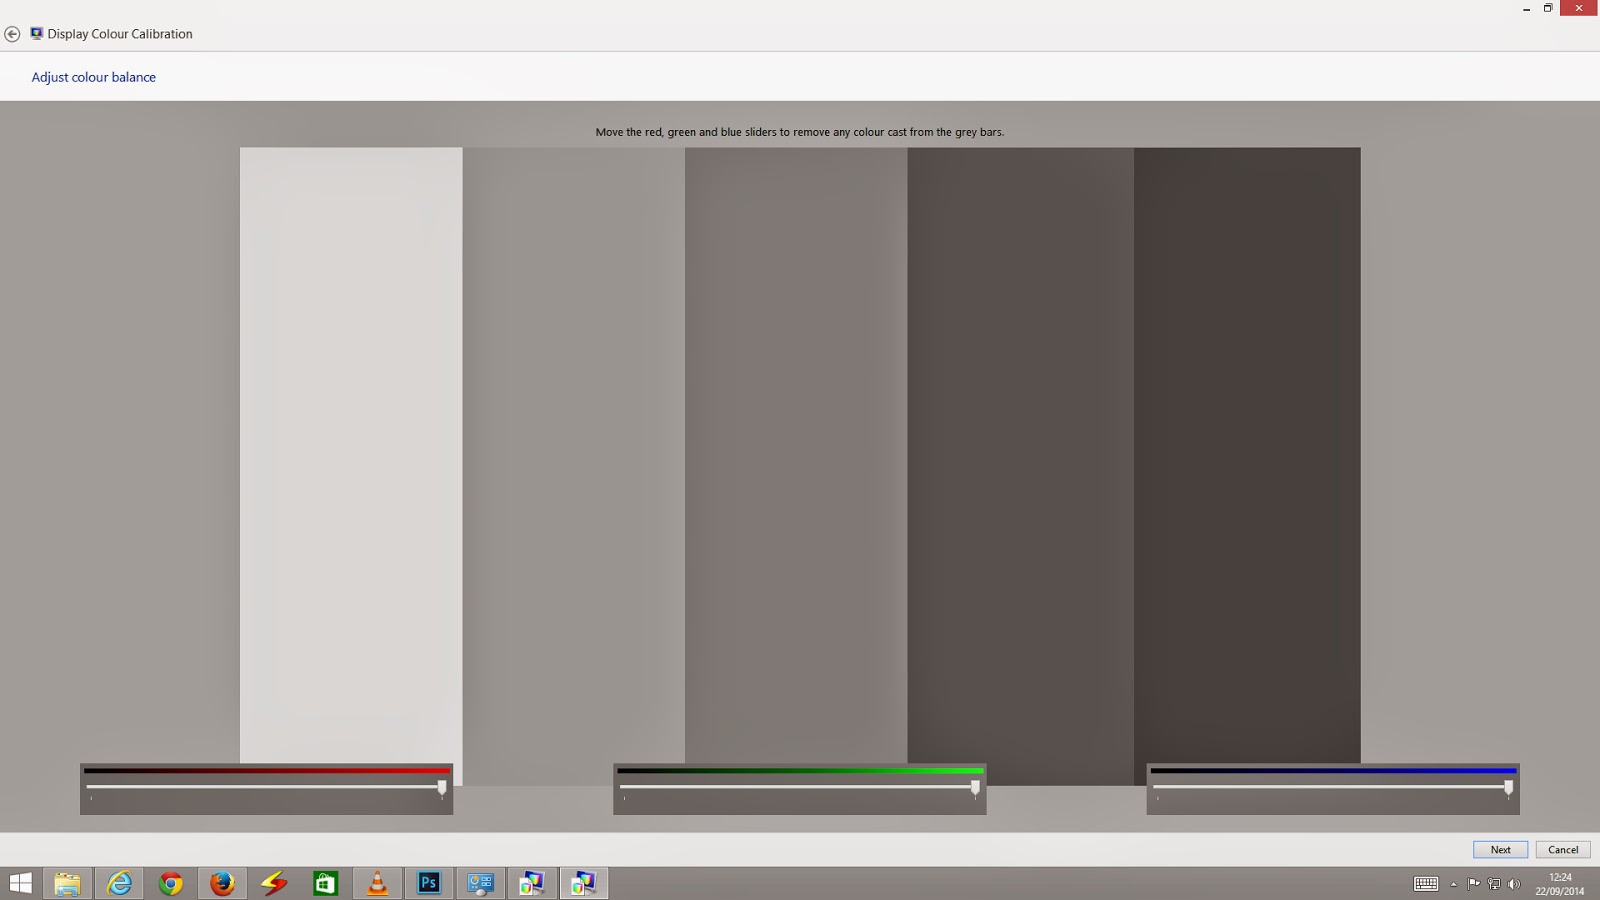
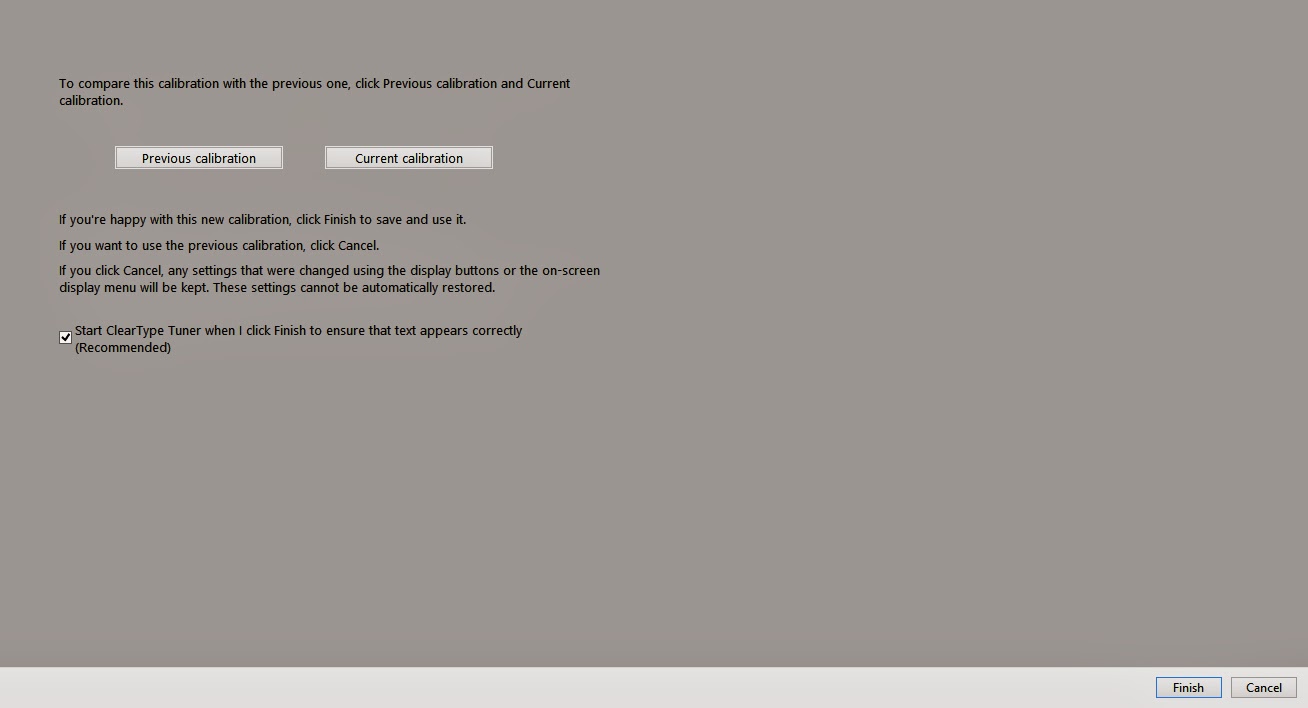
The steps represented by Figures 11-20 are crucial to the accuracy of this process and should be carried out with care. The sliders in steps represented by Figures 13 and 20 should be used very carefully. Normally, only very small amounts of correction are required. If overdone the Gama and Color Balance of the monitor can get skewed. If you are using a very old monitor which has no brightness or contrast control, you can skip this calibration in the step represented by figure 14, above. In the last step (Fig. 21) you can see the before and after results by clicking the Previous and Current calibration buttons. If you are not happy with the new results you may click Cancel to go back to the original settings.
Calibrating display on a Mac
The procedure for calibrating a Mac display is by and large the same. To get to the calibration menu follow this route on a Mac: System Preferences/ Display/Color/ Calibrate. Follow the on-screen instructions.
Conclusion:
Usually, after completing the calibration process the screen will look
slightly warmer. It may take some time to get used to it but believe me,
colors , contrast, brightness and Gama values will be more accurate
than before. You will find noticeable difference in skin tones, textures
and sky colour.
I will be covering hardware based monitor calibration in a subsequent blog. For now enjoy your calibrated display!
Please do send your feedback and comments. I value them.
No comments:
Post a Comment